Pi-Star Hotspot Setup (Step-by-Step)
This guide walks you through setting up a Pi-Star digital hotspot from a blank SD card to a fully working DMR or YSF hotspot. It is written for first-time users and follows the exact order Pi-Star expects things to be done.
This page assumes:
- You already have a hotspot board (MMDVM, etc.)
- You are using a Raspberry Pi Zero / Zero 2 / 3 / 4
- You have a valid amateur radio callsign
- You have a BrandMeister account and a valid DMR ID
⚡ Want to skip the setup?
If you’d rather not flash images, configure Wi-Fi, or troubleshoot BrandMeister settings, I offer pre-configured SD cards and hotspots built using this exact guide.
Step 1: Download Pi-Star
Step 2: Flash the SD Card
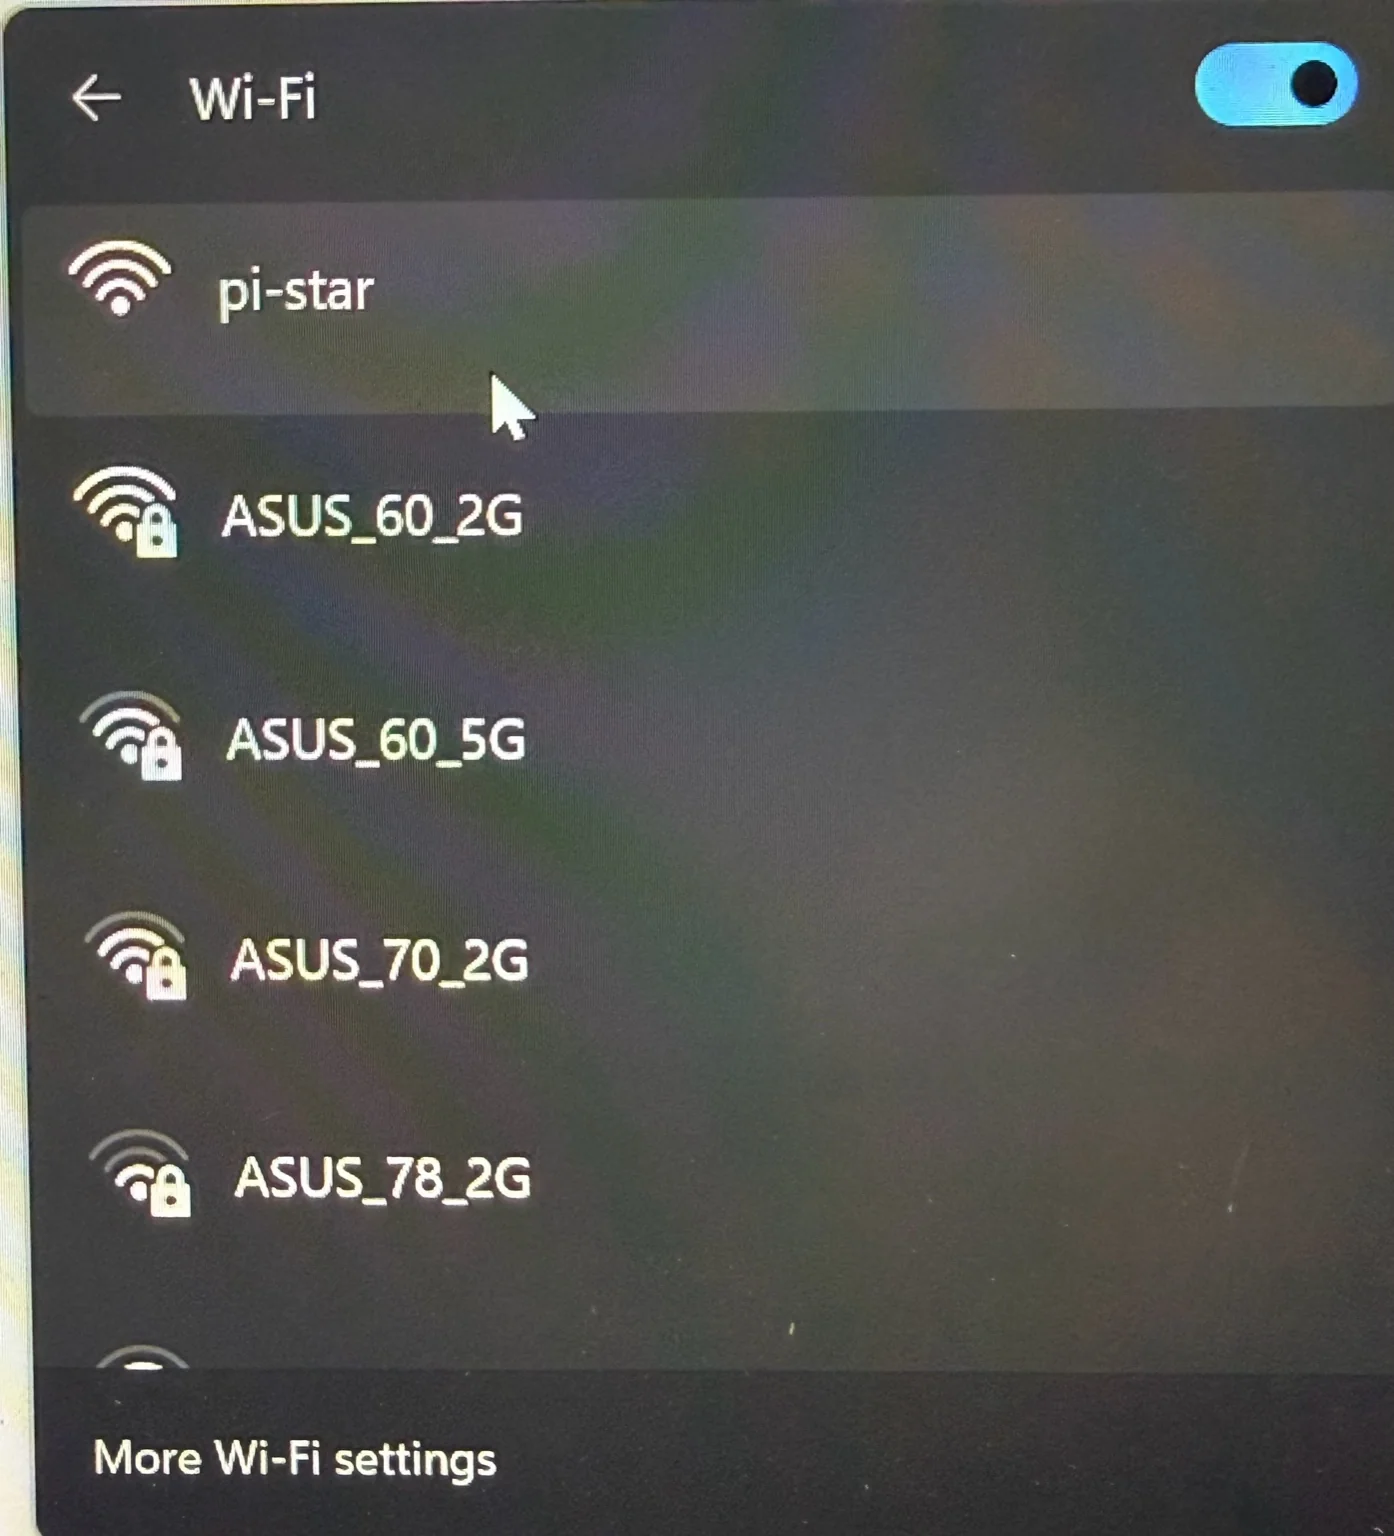
Step 3: First Boot & Temporary Wi-Fi
Pi-Star will create a temporary, unsecured Wi-Fi network if it cannot connect to a known network.
- SSID: pi-star
- Password: None
Step 4: Configure Wi-Fi

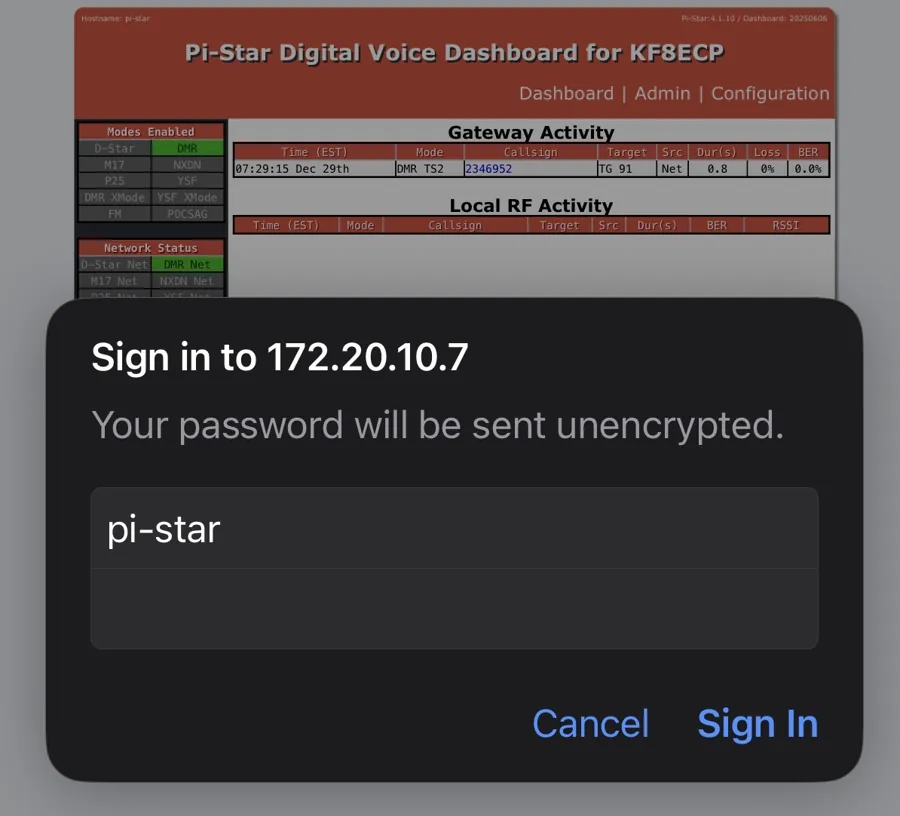
Step 5: Log In & Basic Configuration
- Username: pi-star
- Password: raspberry
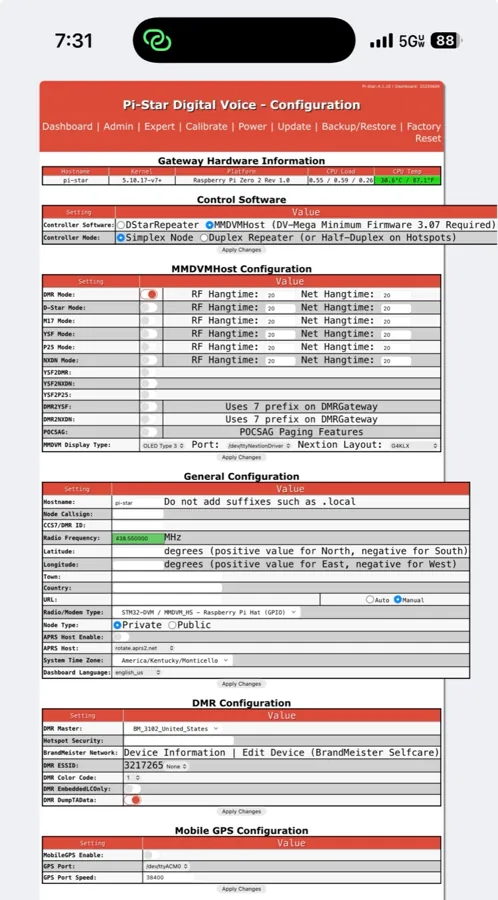
Step 6: Configure DMR / YSF
For DMR, the hotspot security password is your BrandMeister account password.
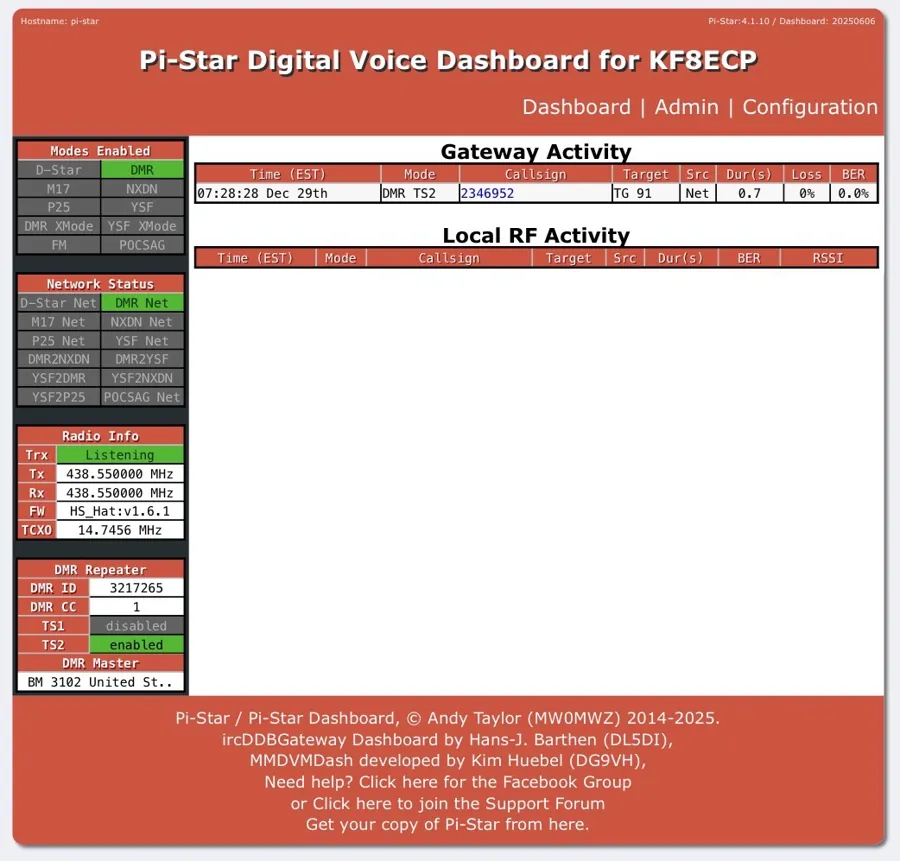
Step 7: Verify Operation
- Dashboard shows connected
- Correct mode enabled
- TX/RX activity visible
Optional Operator Accessories
These items are not required, but many operators find they improve everyday usability and reduce wear on connectors.

Inline USB Power Switch
Allows safe rebooting without unplugging cables.

90° SMA Adapter
Reduces strain and allows cleaner antenna positioning.